DIY Project – Halloween Plates
 This is a fun, but simple project that we were honored to contribute today on The Proper Pinwheel blog. Lexy has a beautiful blog and a beautiful new baby girl.
Here’s a DIY for you to create your own Halloween icon dessert plates, perfect for a festive party. You’ve got to love the short supply list and the fact that no drawing skills are needed for this DIY. I found some cute Halloween stickers I knew would make the perfect stencils for this project. You only need simple white dessert plates and porcelain markers to create these cute one of a kind plates.
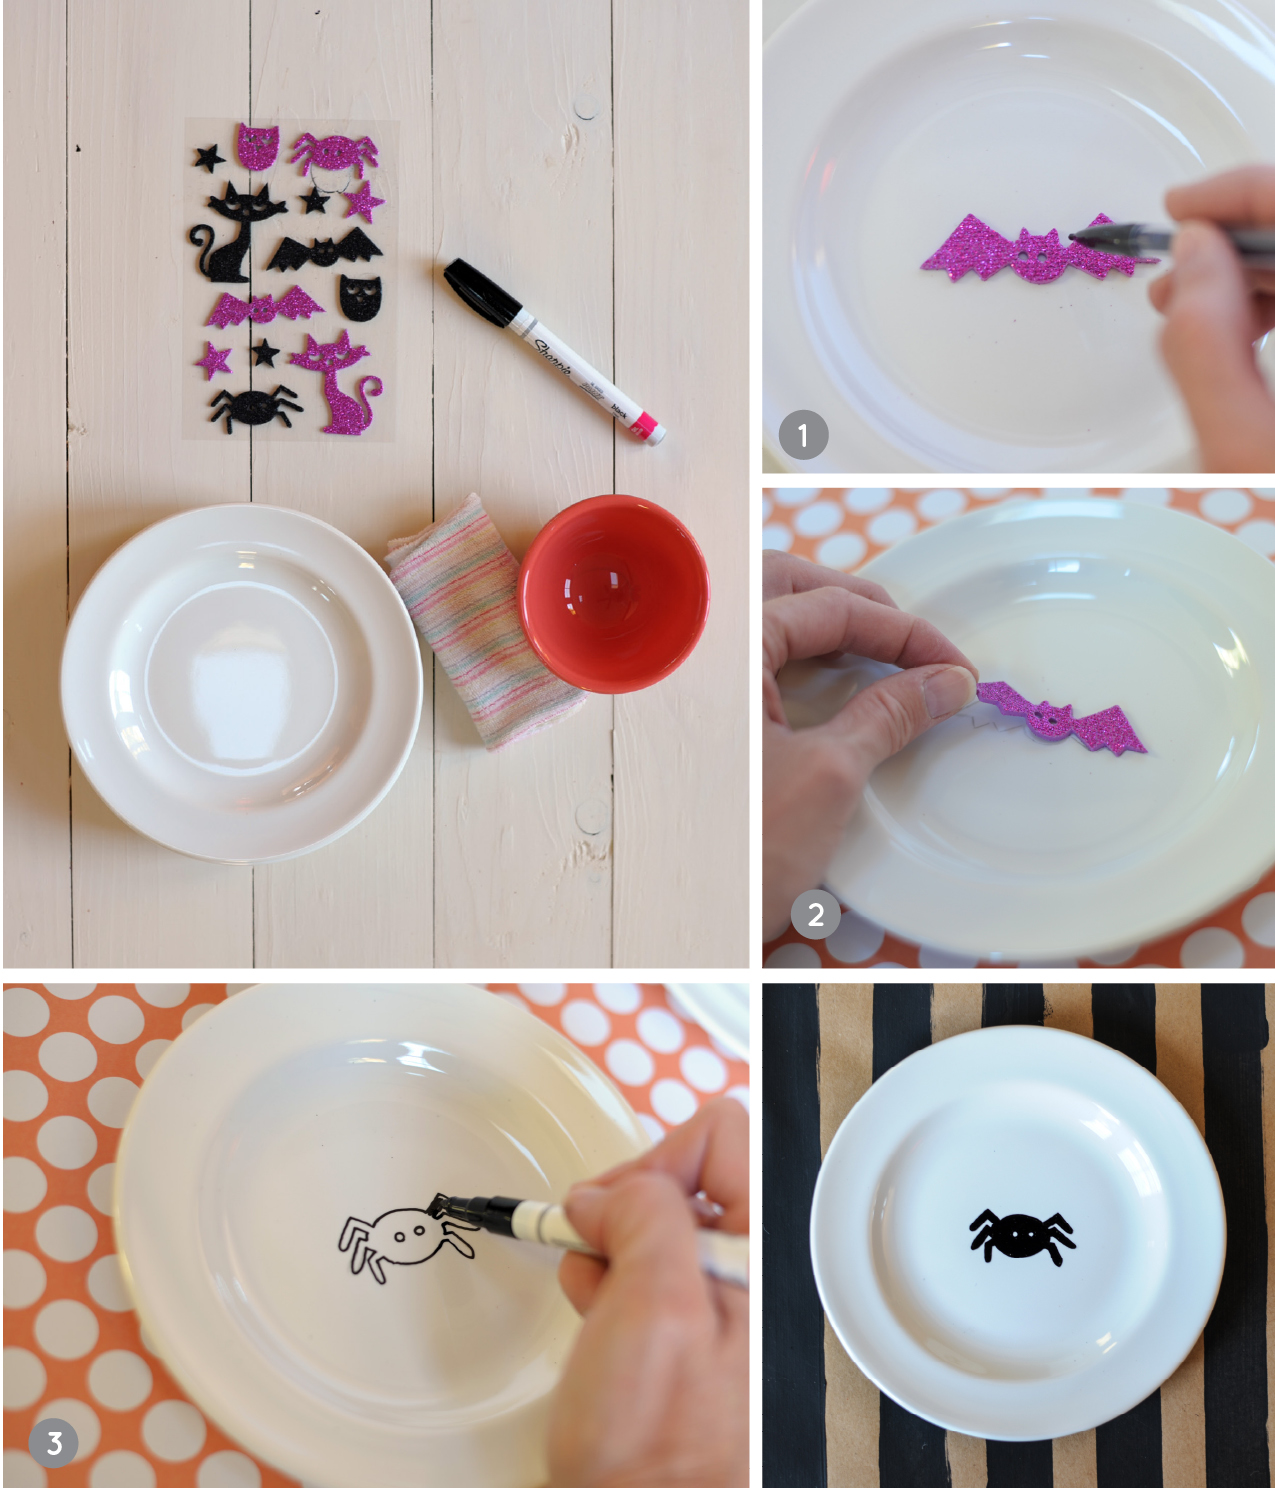 Supply List: white dessert plates, porcelain or oil based paint markers, stickers to use as stencils, soap and water
Instructions:
1. Place your desired sticker on each plate and outline with a pencil. Press hard enough to make an outline.
2. Remove sticker and use your porcelain marker to follow outline of shape, then color in with marker. If you make a mistake, don’t worry, you can simply wash marker off with soap and water. Dry plate and start over.
3. Place the plates in oven. Turn oven on to 350 degrees. Once oven is at 350 degrees, set timer for 30 minutes. Let plates cool in oven with door open. Your plates will be dishwasher safe.
These plates will wow the kids, but are also modern enough to stand out at an adult soiree. They are simple, but still have personality… just what you want for your Halloween shindig. And the best part, you can use them for years! Remember these are not food safe, so please use for decoration only.
–Melissa


Love the Halloween plates.
Thanks Angela!